


Preamble
Recently, I had to assist with the import of a Microsoft SQL (MSSQL) database to a new Virtual Machine (VM). The database backup was stored locally on the source VM and then copied to a network drive to be shared with the destination VM.
Due to space saving measures, we wanted to import the database backup directly from the network drive onto the destination VM's storage. This will save time and effort in copying the database backup onto the destination VM before doing the import, and potentially make the import process faster.
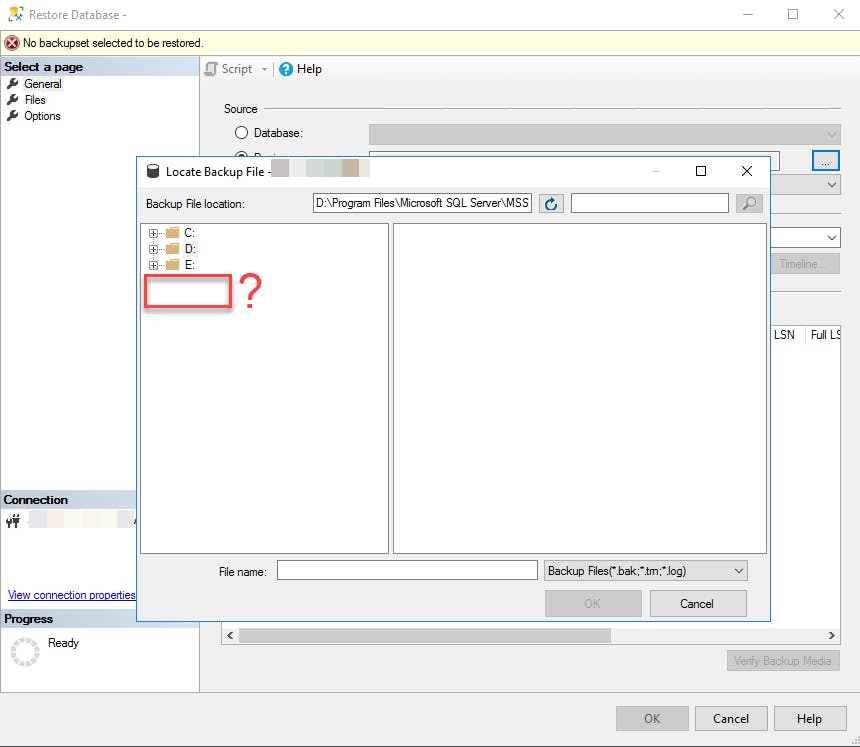
I mapped the network drive on the destination VM and was wondering why I could not see it from the 'Restore Database' tool in Microsoft SQL Server Management Studio 18 (SSMS). I even tried to enter the full file path to the database backup to no avail.
Findings
I read many articles that instructed the use of commands to map network drives from within SSMS and I initially thought this was unnecessary and the reasons weren't clearly shared. But I came across this Microsoft documentation that explains why SSMS couldn't see the mapped network drive and why the commands were necessary.
When you run Sqlservr.exe as a service, SQL Server runs in a separate session that has no relation to your login session.
In simpler terms, SSMS only presents the local and network drives that the SQL Server service sees. And SQL Server service runs on a different account from the one that I used to login to the VM. Therefore, I should be mapping the network drive on the account running SQL Server service instead of my user account.
How To
To map the network drive for the account running SQL Server service, from SSMS, create a 'New Query' with the following commands to allow SQL to allow commands to be executed from a Windows command shell.
-- To allow advanced options to be changed.
EXECUTE sp_configure 'show advanced options', 1;
GO
-- To update the currently configured value for advanced options.
RECONFIGURE;
GO
-- To enable the feature.
EXECUTE sp_configure 'xp_cmdshell', 1;
GO
-- To update the currently configured value for this feature.
RECONFIGURE;
GO
Once the above commands are successfully ran, you can then send the Windows command to map the network drive and executed in a newly spawned Windows command shell.
-- Use the command applicable to your setup.
-- Replace "\\192.168.0.1\NetworkShare" with your network share.

-- If no username or password is required to mount the network drive.
EXECUTE XP_CMDSHELL 'net use X: \\192.168.0.1\NetworkShare';

-- If a username and password is required to mount the network drive.
EXECUTE XP_CMDSHELL 'net use X: \\192.168.0.1\NetworkShare /user:Username MyPassword';

-- If username / password contains space(s), enclose them in double quotes.
EXECUTE XP_CMDSHELL 'net use X: \\192.168.0.1\NetworkShare /user:"Username" "MyPassword"';

-- Optionally delete the mapped drive
EXECUTE XP_CMDSHELL 'net use X: /delete'
After the command are successfully ran, the network drive can then be seen in both the 'Back Up Database' and 'Restore Database' tool in SSMS. With a mapped network drive, this can be a useful way to backup and export a database directly to a network drive for faster sharing between servers/VMs.
If you like what I wrote, please support me here! %%[ko-fi]